PM Najib Tiru slogan "Endless Possibilities" Israel.

KUALA LUMPUR: Naib Presiden PAS Datuk Mahfuz Omar secara sinis melahirkan "rasa kagum" dengan keberanian Perdana Menteri Datuk Seri Najib Razak berhubung penggunaan slogan "Endless Possibilities".

Menurut Ahli Parlimen Pokok Sena itu, ini kerana slogan tersebut adalah meniru slogan yang digunakan kerajaan haram Israel.

"Saya ucapkan setinggi-tinggi tahniah kepada Perdana Menteri yang begitu luar biasa keberaniannya meniru dan menciplak slogan dan falsafah yang dipelopori oleh entiti haram Zionis Israel.

"Tidak ada mana-mana Perdana Menteri negara kita sebelum ini yang mempunyai keberanian yang begitu unggul seperti Najib untuk memperlihatkan betapa terpaut dan terikatnya hati kepada Israel," katanya sinis.

Tambah Mahfuz lagi, tidak ada mana-mana pemimpin negara umat Islam yang lain yang seberani Najib meniru dan menghayati slogan dan falsafah Israel.

"Falsafah 1Malaysia dia tiru dari One Israel setelah Dewan Rakyat diberitahu jutaan ringgit wang rakyat dibelanjakan untuk khidmat  firma Israel, Apco Worldwide.
"Sekarang 'Endless Possibilities' pula dia tiru.

"Berapa juta ringgit pula wang rakyat beliau habiskan untuk mendapatkan slogan tiru itu, kita tidak tahu," katanya.

Malay Mail semalam melaporkan, laman web rasmi Kementerian Pelancongan Israel mempunyai pautan (link) kepada "Conference and Incentive Tourism" di bawah tajuk "Our Websites".

Pautan itu membawa kepada laman web yang memaparkan dengan begitu menonjol tagline "Israel: One Place. Endless Possibilities" di sudut kiri bahagian atas.

Tagline yang sama juga menjadi tajuk kenyataan akhbar Kementerian Pelancongan Israel pada 22 April 2013 di dalam laman web IMEX 2014, iaitu ekspo pelancongan dunia yang akan diadakan di Frankfurt, German tahun hadapan.

Sumber - LINK

Teknologi mengapungkan Objek EZ Float Technology

EZ Float Technology teknologi yang membuatkan objek terapung. Sesuai untuk mempaperkan barang kemas , mainan, barang perhiasan dan koleksi lain yang sesuai.

Lihat Video di bawah.

How to create your own WiFi from Laptop

How to create wireless access point by using the cmd command
  1. Start-> Search programs and files type "cmd" right click then Run as administrator
  2. type netsh enter, wlan enter.
  3. set hostednetwork mode=allow ssid="Access Point Name" key=passphrase
  4. Command to start and stop hostednetwork "start hostednetwork" and to stop "stop hostednetwork"
    Example:

    hostednetwork
    Source - Link

    Meteor shower photos 2013

    Meteor shower will peak overnight Sunday and into Monday, and as many as a hundred meteors will blaze through the sky every hour.

    Supposed ‘non-final’ press render of the HTC One Max leaks

    We have seen a number of leaks regarding the HTC One Max as of late so lets keep it rolling. Today’s leak is supposedly the a non-final press render of it. From images we saw last week, it isn’t going to look much different than the One so it really isn’t hard for someone to fake. To me the image in itself looks okay, but Senior Global Online Communications Manager Jeff Gordon says it’s fake. @evleaks has a pretty good track record, and if this in fact fake, their reliability is still somewhat intact since they did say it’s “non-final”.

    Whatever the situation is with the image, we can point out some interesting things such as the lack of a Beats logo on the back. You will also notice their are separate volume keys (like the One Mini) instead of one rocker (like the One) and the LED flash is below the lens rather than next to it. Because of the larger size of the device, the BoomSound speaker (only the bottom one shown) is much wider than it’s siblings. Either way, this render is probably not too far off from what the real Max will look like. Stay tuned.

    source: @evleaks

    How to make bootable Windows 7 installer USB Drive Using CMD

    Step 1:

    Plug-in your USB drive:
    • Make sure all your USB Drive content copy to your harddisk

    Step 2:

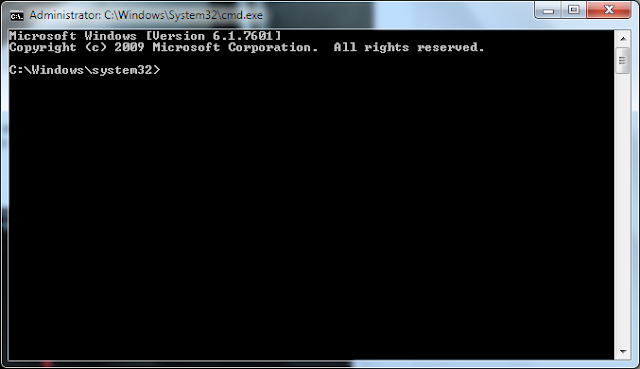
    Open Command Prompt(CMD) as an Administrator 
    1. Go to Start menu
    2. Search for CMD
    3. Right Click then select Run as administrator
    Search for CMD

    Run as administrator

    Instagram new update support Recording video for Android ICS

    Now Android ICS can record video on Instagram 


    Here is a note about the update from Instagram:
    = New in 4.1 =
    * Share videos from your photo library
    * Recording video is now also supported for all devices running ICS (Ice Cream Sandwich)
    

    ScreenShot Instagram playstore

    Screenshot new update Instagram on my Android ICS

    Download from PlayStore 

    How to view your uploaded photos on blogger

    Where your blogger photos saved?
    How to check or view your uploaded photos?

    Go to www.google.com SIGN IN google you account
    Click More then Click Photos

    After you will see your uploaded photos
    You also can delete your uploaded photo from here

    Samsung Galaxy Folder leaks

    Samsung is rumored to be working on a clamshell Android powered phone, which is designed exclusively for those who long for the good old days. Now there's a good reason why the folder form factor are almost extinct now (it wastes too much space for a world obsessed with thin and compact), but obviously Samsung feels it's worth another chance.

     
    Samsung Galaxy Folder will be an Android powered flip-phone with a classic alphanumeric keyboard and a touch screen. The upcoming device is rumored to feature a display with a resolution of 800 x 480 pixels and the phone is expected to feature a dual-core Qualcomm Snapdragon S4 processor.
    The Galaxy Folder will run on Android 4.2.2 Jelly Bean and will be equipped with LTE radio. Unfortunately, there is no word on the launch date and the pricing of the flip-phone at the moment.
    Source - http://hi-tech.mail.ru/news/misc/galaxy-folder-soon.html?utm_source=dlvr.it&utm_medium=twitter

    Specification Rumour

    Display 
    • Dual Display
    • 3.7-inch AMOLED display 
    • resolution of 480x800 pixels
    Memory
    • 2GB of RAM
    Features
    • Os  Android 4.2.2
    • CPU  1.7GHz Snapdragon 400 
    • 1820mAh battery

    More picture Samsung Galaxy Folder


    PHP simple login system with session

    Step 1 : Create database

    You should already create database name. then create table name Users
    You can create from phpmysql or other tools.

    Sql Code
    CREATE TABLE `users` (
      `ID` int(2) NOT NULL AUTO_INCREMENT,
      `Fullname` varchar(32) NOT NULL,
      `Username` varchar(32) NOT NULL,
      `Password` varchar(32) NOT NULL,
      PRIMARY KEY (`ID`)
    )

    Step 2 :  Create php file 

    Create file name database.php, login.php  and login_success.php on your directory


    Step 3 :  php code database connection

    database.php
    <?php
    $dbhost = "localhost"; 
    $dbuser = "root"; //your username database
    $dbpass = ""; //Your password database
    $dbname = "test"; //Your database name
    
    $dblink = mysql_connect($dbhost,$dbuser,$dbpass) or die(mysql_error());
    mysql_select_db($dbname) or die(mysql_error());
    ?>
    

    Step 4 : login code and html form

    <?php 
    session_start();
    include("database.php");
    if(isset($_POST['login'])){
     $username = $_POST['username'];
     $password = $_POST['password'];
     if(!empty($username) && !empty($password)){ //Username and password must filled
      $sql_login ="SELECT `ID`, `Fullname`, `Username`, `Password` FROM `users` WHERE `Username`='".$username."' AND `Password`='".$password."'";
      $result = mysql_query($sql_login,$dblink);//execute the sql command
      $rows = mysql_fetch_assoc($result);
      
      if($rows['Username'] == $username && $rows['Password'] == $password){ 
       $_SESSION['fullname'] = $rows['Fullname'];
       header('Location: login_success.php');
      }else{ //Wrong username or password
       echo "<script>alert('invalid username or password please try again')</script>";
      }
      mysql_close();
     }else{
      echo "<font color=\"red\">Username and Password field are required</font>";
     }
    }
    ?>
    <!DOCTYPE html>
    <html xmlns="http://www.w3.org/1999/xhtml">
    <head>
    <title>Login</title>
    </head>
    <body>
    <div style="width:350px;margin:0 auto;background-color:#0099FF;margin-top:50px;padding:5px;border:1px solid #666">
      <h2>Login</h2>
      <center>
      <form action="<?php echo $_SERVER['PHP_SELF'] ?>" method="post">
        <p>Username
          <input type="text" name="username" maxlength="32" />
        </p>
        <p>Password
          <input type="password" name="password" maxlength="32" />
        </p>
        <p><input type="submit" name="login" value="LOGIN" /></p>
      </form>
      </center>
    </div>
    </body>
    </html>
    

    Step 5 : login_success.php and logout.php code

    login_success.php
    now create new file name logout.php
    logout.php code

    Finish now its time to test

    before that you need to insert user on your database.
    for example
    Login form

    login successful

    Macbook Pro Retina Durability test

    Get identity or autonumber after Insert Query


    Example Code for creating invoice


    Private Sub CreateInvoiceQuery()
            Dim InsertCom = Me.InvoiceDataAdapterX.Adapter.InsertCommand
            If invoice_id = Nothing Then
                InsertCom.CommandText = "INSERT INTO `invoice` (`date_created`, `customerid`) VALUES (?, ?)"
    
                InsertCom.Parameters(0).Value = CType(Me.DateTimePicker1.Value, Date)
                InsertCom.Parameters(1).Value = 1
                InsertCom.Connection.Open()
                InsertCom.ExecuteNonQuery()
                InsertCom.CommandText = "SELECT @@IDENTITY"
                invoice_id = InsertCom.ExecuteScalar
                NoInvoiceTextBox.Text = invoice_id.ToString("D6")
                InsertCom.Connection.Close()
                InsertCom.Dispose()
            End If
            Debug.WriteLine(invoice_id.ToString)
        End Sub